We’ve all heard those classic stories of people putting egg boxes on the wall to soundproof their makeshift home studio. Well, funnily enough, it might help — but probably not in the way you’d expect.
When talking about soundproofing people, tend to think of knobby foam tiles and carpets on the wall, when actually those materials are best used for acoustically treating a room (which is not the same thing).
Blocking sound or soundproofing is really quite difficult and a bit of an undertaking whereas making a room sound better by acoustic treatment is something we can all do relatively easily and it’ll improve our recordings no end.
Here’s what we’ll cover in our discussion of DIY acoustic treatment:
- Soundproofing
- Acoustic treatment
- Identifying home studio problems
- Textiles
- Acoustic tiles
- Bass traps
- Acoustic panels
- Vocal reflection filters
So, let’s get this out of the way first. Soundproofing is the act of preventing sound leaving or entering a room. You don’t want to get passing traffic or dogs barking, people walking on the floor above or next door’s music system onto your recordings when using microphones. Or you don’t want your vocals or your drum kit to annoy your neighbors and get you thrown out of your flat.
But soundproofing requires the building of mass into your walls, floors, and ceilings. It requires new doors, seals, fittings and then some sort of ventilation system. Maybe, if the ambient and environmental sound around where you record is so awful, you really should think about doing it somewhere else.
However, you can, if you want, put in a second skin to your walls and add sound dampening materials, or ideally build a floating room inside your room to isolate it from transferred vibrations. Or you can buy an off-the-shelf soundproofed vocal booth. All of these things would be awesome but probably out of reach unless you are building a proper recording studio — in which case, stop looking on the internet and get some professionals in to do it for you!
In all seriousness, soundproofing is probably not something that’s realistic for a home studio beyond closing windows, blocking holes and putting a carpet down. However, creating a quieter, more focused environment that makes your recordings and your mixings sound so much better is completely possible — and we call this “acoustic treatment.”
This is the act of using acoustic absorbing materials to dampen sound reflections and keep sound and reverb under control in your recording space. This means that your recorded vocals will sound dryer and cleaner, and your mixing will be more precise and less fatiguing. It can also reduce environment sounds and lower the background noise floor — which is probably what you meant by “soundproofing.”
The problem is perhaps best described as the character of your vocals or instruments sounding like where it was recorded. By which I mean that it sounds like it was recorded in a garage because it was recorded in a garage.
Rooms have a tone. Some rooms have a great tone and we like to use that character when we add reverb and other processing to our audio — but we’re unlikely to be blessed with a recording space that has a desirable tone, so ideally, we want no tone at all. Acoustic treatment removes the natural reverb from our room so that we can add a fake one in the mix.
There are all sorts of clever methods of testing the acoustics of a room. You can use signal generators or pink noise and measuring equipment but few of us tend to have that sort of gear knocking around.
Instead, stand in the middle of the room and clap. You should notice the reflected sound, also called Flutter Echo. It may be the lushest deep return of a thousand years of worship if your room is a cathedral, but it’s more likely to sound short, sharp and metallic. Do the same test in your tiled bathroom for an extreme example. The more ring-like and metallic the sound, the more acoustic treatment you are going to need.
Reverberation is all about reflections. When you make a sound, it goes out in straight lines in all directions and then bounces off whatever surfaces it meets. As those reflected waves are traveling further than the original sound we hear them slightly delayed; it’s the delay and the bouncing around of the sound that we identify as reverb.
If you were standing in a cathedral with distant walls and ceilings the reverb would be huge because of the distances being traveled and you’d be getting into echo territory. But that would probably sound fabulous — your room isn’t going to.
As the sound bounces around the room, the frequencies have the potential to interfere with each other and change and confuse the balance. So, we want to stop or reduce those reflections so that when we sing into the microphone all we get is the direct sound going in and not all the reflected sound as well.
Generally, speaking sound gets reflected more off shiny, hard surfaces — that’s why you think you sound so awesome when you sing in the shower in a tiled bathroom. This is where your egg boxes and carpets come in. Actually, leave the egg boxes behind, but textiles are the first thing you should consider for dampening those reflections.
We know that the best solution is going to be proper acoustic tiles, but these are expensive, whereas you’ve probably got all sorts of textiles hanging around that would offer a good place to start.
Draw the curtains, put a good rug down and drape some material about the place. Cover any shiny surfaces and it will start to bring your room under control. If you want to do something a bit more deliberate, then get hold of a bunch of blankets. You can just hang them up or wrap them around sheets of cardboard to create panels, which you could experiment with and position more precisely.
The thickness of the material will be a factor, in which case you could step up to carpets on the walls, or foam, mattresses or egg-crate mattress covers if you want something that pretends to look like acoustic panels.
Ultimately, if you are doing it on the cheap then anything is going to be better than nothing. And don’t be afraid to experiment and ignore how it looks. Plenty of vocals have been recorded inside a crush of mattresses — it’s not ideal, but it can give you a good clean take.
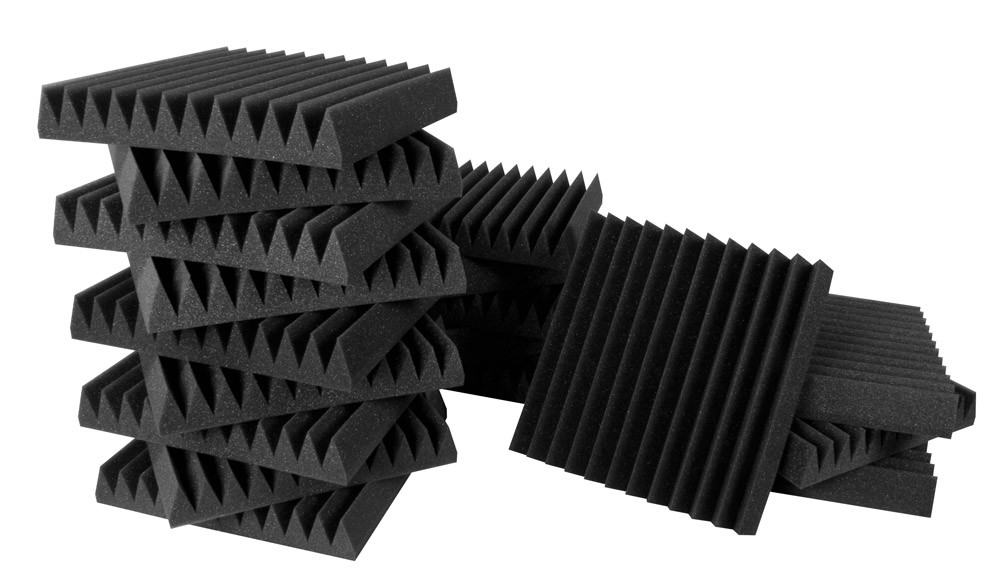
We got here eventually. If you want to do this properly, then, of course, you should invest in the proper materials. Acoustic tiles (or panels) are those very cool looking squares of patterned foam that you see on the walls of all the best studios. These are designed to absorb frequencies rather than reflect them back.
One thing to remember is that you’ll probably need less than you think. Once you start treating your room with the right materials you won’t need to cover every surface. In fact, the room might end up sound too dead if you do. With a few well-placed tiles you can calm down the reflections still while leaving some life in the space.
There are various characteristics associated with acoustic panels: type of 3D pattern, NRC (Noise Reduction Coefficient) rating and SRC (Sound Absorption Coefficient), but ultimately none of these things are terribly important. If you are buying “acoustic tiles” then they should be fit for purpose.
Most acoustic tiles are good at absorbing mid-to-high frequencies but where you will probably have the biggest problem is with those pesky big bass low-end frequencies.
We tend to get studio monitors that are far too big for our room and then add in sub-bass and all sorts. In a small room, the low frequencies can create all sorts of unintended distortion. So, let’s deal with the bass first.
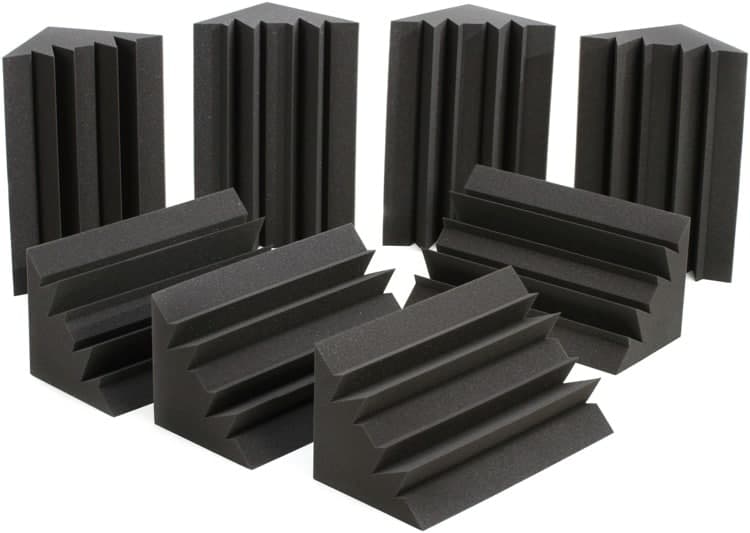
This is about treating your mixing environment more than your recording space. Vocals are never going to generate the sort of frequencies that need bass traps. But, when mixing, you can get a lot of bass build-up and reflections that are not going to be absorbed by regular acoustic tiles. Most commonly, low frequencies build up along room boundaries and especially in the corners.
The best way to deal with bass problems is to put thick foam wedges into the corners of your room where the walls and ceiling meet. It’s those right-angles that cause all the trouble. Start with the top corners and you’ll notice an immediate difference. The bass should become more defined, less colored and easier to work with. Then experiment with the floor corners, although there are often things in the way already.
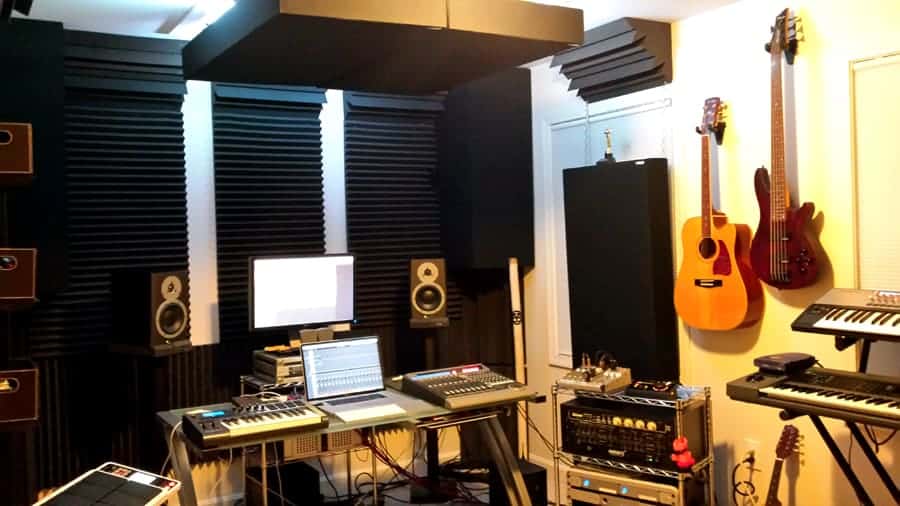
With your bass traps in place then we come to the positioning of the acoustic panels to help with the mid-to-high frequencies. You could wallpaper the entire space with them like you would with a vocal booth, but that can also create an unreal feel to a space and is largely unnecessary and ends up being expensive.
The first place to cover is directly behind your studio monitors, especially if they have a rear bass port. Next, use them diagonally across where the walls meet the ceiling to remove those right-angles. These supplement the bass traps you’ve already installed.
Now we come to the walls.
Place a few tiles on the wall and try the clap test again. With smaller rooms, you don’t necessarily need to place tiles opposite each other. One tile should be enough to prevent a standing wave from building up between two surfaces. That way you could create a sort of patchwork pattern with a tile then a gap, then another tile and do the opposite on the other facing wall.
Add a few more tiles and repeat the clap test. At some point, you will have to judge whether the response to the clap sounds good to you and that any harshness, ringing or metallic reflections are gone.
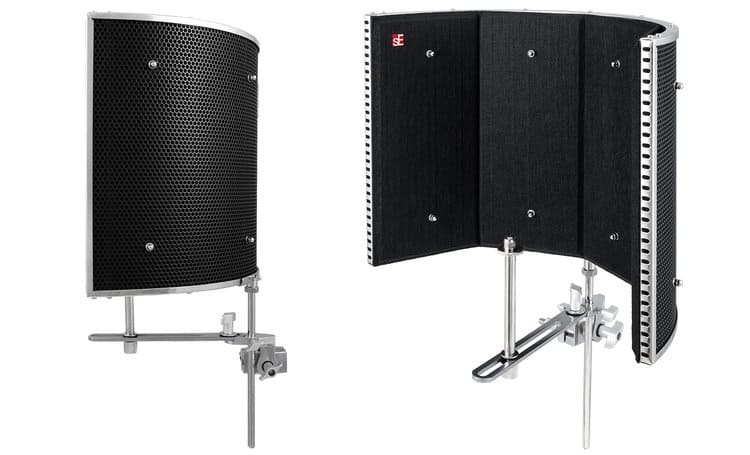
Coming back to dealing with vocal recording and reflections, one recent device that could be a decent solution for the small studio is the reflection filter. The idea is that it creates a half-circle of absorption around the microphone, reducing the energy that’s entering the room from the singer’s voice and minimizing the reflection back into the microphone.
These can certainly help in a less than ideal space, but you would still need to treat the space behind the vocalist. But you could pull out our old friend the mattress or some other textiles to achieve that. So, yes, these are helpful but best used in conjunction with other treatments.
Unless you have a purpose-built studio you are never going to create the perfect conditions for recording or mixing. However, with a bit of experimentation and a handful of blankets, you can have a positive effect on the sound of your room.
The biggest impact would probably come from bass traps in the corners, so if you can afford one thing, then go for those. Then build up slowly with commercially available acoustic panels or look into making them yourself. It doesn’t have to be expensive if you start with what you’ve got, and anything is going to be better than nothing.