Music Career Finder

Start Here:

1. 1. Pick one. *This question is required.
2. 2. What are you most interested in? Select as many as you like.  *This question is required.

There are many reasons musicians want to make recordings. Whether to use as professional demos, to sell as downloadable tracks or on CDs, for streaming or music videos, to add to visual media like films, or just to register and document, recording music is an art form in itself.

There are techniques to master and limitations to what can be achieved artistically, technically and aesthetically. This article is meant for musicians who are relatively new to the recording process and wish to gain basic knowledge regarding how to go about capturing their music in a recording.

At some risk of oversimplification, we can say there are three stages of creating a recording: pre-production, production, and post-production. I’ll explain each one in brief.

This is the way most professional musicians, Producers and performing artists visualize the recording process. I’ll do my best to share what I have learned over years of experience with recording, both live and in the recording studio.

Pre-production

Pre-production describes everything that needs to happen up until the first notes are actually recorded. There are many decisions, and gathering all the information needed to make those decisions can consume a fair amount of time.

In fact, pre-production can sometimes take longer than the other two stages combined. Many artists take as much as a year or more in the pre-production stage. Actually, at the moment you have decided to make a record you could already be in pre-production!

Below I have listed the types of decisions and activities associated with the pre-production phase of a recording.

The list is not meant to be exhaustive; rather it should be viewed as representative of the types of things that need to happen before the microphones capture the first notes of the planned recording.

  • Choose material to be recorded.
  • Choose musicians.
  • Arrange music for the recording.
  • Schedule rehearsals.
  • Investigate potential recording studios or remote sites.
  • Gather reference tracks.
  • Secure permission from owners of rights of any music not composed by you.
  • Choose Caterer for session; find out about musicians’ dietary needs.
  • Talk to Graphic Artists and Photographers about artwork and design of materials.
  • Talk to Web Designer about website (as applicable).
  • Line up a Videographer to capture some scenes in the studio or make a music video.
  • Estimate budget items line by line; create total budget.
  • Procure budget.
  • Book studio dates.
  • Decide about recording methods, tracking, software, etc.
  • Consider transportation needs of musicians and instrument transport.
  • Complete “trial” or practice recordings of basic tracks.
  • Learn the music (!)

Again, this is not a complete list but is intended to give you an idea of the kinds of things that need to occur before the music actually gets recorded. There are aspects of each of these planning items I could explain much more deeply, however that is beyond the scope of this article.
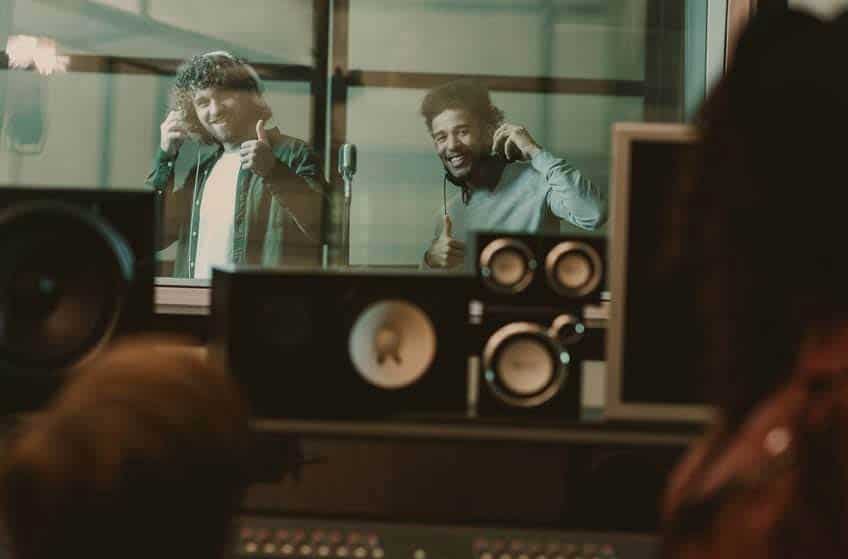
There are so many variables with studios that you will want to have a checklist prepared, along with a thorough list of questions. The goal is to avoid unpleasant surprises later on when you discover you forgot to ask about an important aspect.

Choosing A Studio

Just to give one example, the choice of studio is a particularly important one. Every studio is different when it comes to characteristics of the physical space, equipment, personnel, and location. Are the lines of sight workable for your session? Is the equipment well-maintained and does it fulfill your needs?

What instruments and microphones will be on hand for your session? Is the Engineer included in the cost of the studio rental? If you have to load equipment into the studio, is it difficult to do so? Is there parking available? How much does the studio cost per hour or per day?

There are so many variables with studios that you will want to have a checklist prepared, along with a thorough list of questions. The goal is to avoid unpleasant surprises later on when you discover you forgot to ask about an important aspect.

The usual procedure is to visit a number of different studios and be shown around with plenty of time for asking questions. You will want to listen to recordings that were made in each studio and if possible, witness a portion of an actual session, or at least hear what is happening with some work that is still in progress.

If you are planning on a remote location for recording, you will need to spend some time there at the times of day you plan to record, to see what is going on in the area or if there will be ambient noise.

The logistics of moving equipment in and out will have to be considered, with setup and teardown times. With both remote locations and recording studios, you are likely to find there is no perfect place to make recordings; there will always be pluses and minuses of every option you have. In the end you will need to make a decision based on your accounting of these positive and negative characteristics.

If you take the above example regarding what is involved in the selection of an appropriate studio or location, then realize all this investigation has to be scheduled in advance, and then extrapolate this laborious process out to the many other aspects of pre-production, you can start to see why this stage of the recording process can take so much time.

Don’t forget to check out this guide to find out some record labels that accept demos.

Can you make professional music in a home studio?

Tom Stein

Absolutely, yes. Many artists start out this way, and there are some great albums and tracks that have been released and were made in a home studio. Nowadays, you don’t need a lot of money to produce professional-sounding tracks at home, since the equipment is very inexpensive when compared to even just a few years ago. Understanding MIDI technology (Musical Instrument Digital Interface) is important since this is how computers and instruments “talk” to each other. You should also have a good working knowledge of the types of microphones, pop-filters, and sequencing programs such as Logic Pro X. Getting a good DAW (Digital Audio Workstation) and learning all you can about Audio Engineering will also be important to anyone making recordings in a home studio.


How much does it cost to professionally record a song?

Tom Stein

It’s possible to get a good recording for somewhere between $200.00 to $500.00, perhaps using some pre-recorded tracks created for you by a beat and loop maker. If you sing and play all the instruments, you could get it done for less. There’s more to releasing music than just recording, though. Consider you will likely need a music video, artwork, and some marketing in order to get traction with music executives and fans. A fully outfitted recording studio together with a sound engineer will run (on the low side) around $500.00 a day, but you might save money if you just need it for a few hours.

Recording a song or songs is a project, with a beginning, middle and end, as explained in this article. Most artists or songwriters will go into a recording project with a group of songs, not just one. This way they can keep only the songs that turned out well, and it’s more economical than recording just a single song. If you are using your own DAW, microphone, and peripherals, it might cost very little to record your song at home. You might also be able to access recording equipment through your school or at a local community organization that provides such services.

Hey, what do you think about trying our new Music Career HelperMusic Career Helper really quick? It’s totally free and could help get your career moving fast! Give it a try. It’s totally free and you have nothing to lose.

Production

This is the fun part, usually. Getting in the studio and recording the tracks can be rewarding, exciting, and sometimes frustrating. Not everything turns out as planned. After doing all the work of pre-production you hope that at least all of the foreseeable issues are taken care of.

The many things you can’t foresee will arise to present new challenges, maybe depending to some extent on pure luck. It is good to be prepared for contingencies, be flexible and expect some unexpected things will happen. Hope for the best and prepare for the worst.

For this reason, it’s recommended to record more songs than you actually plan to use. This way you can keep only the best work. If you intend to have twelve songs for release, it is a good idea to record about twenty. This way, when a track doesn’t come out as you intended, you can put it aside and keep the ones that came out as you wished and hoped for.

If you lay basic tracks with rhythm section on twenty tracks, you can pick the best twelve to fifteen for overdubs and mixing. If you need six tracks for an EP, plan to record at least ten to twelve to start.

How do I make my recording sound professional?

Tom Stein

You can always rent a fully-equipped top-notch professional recording studio, along with hiring an experienced music producer and engineer, but most of us don’t have the budget for that. Fortunately, a little knowledge about how to make great recordings can go a long way, and there’s inexpensive hardware and software solutions designed to help you get the best recordings possible. It’s important to consider the room you will use (should be “dry” – meaning not too many hard surfaces to reflect sound), your microphones and digital interface (DAW), and then know how to use signal processing (a.k.a. effects, or FX) in editing and enhancing the sound you’ve captured in the recording. There are other techniques to master and of course, if your music is really great that will also help.

Have a Plan to Follow

In preparing for battle, Dwight D. Eisenhower said: “ . . .plans are useless, but planning is indispensable.” When going into the studio you should have already developed a cohesive plan (this was an outcome of the pre-production phase). Most people start with laying basic rhythm section tracks live with a “scratch” vocal used as a guide; the real vocal will be re-sung later.

Plan on retreating to the control booth frequently to listen to takes during the process, to get an idea of how it is turning out or what you could adjust in the playing to enhance the recorded tracks. If a track is good but there are a few mistakes, you can punch in and out for an instrument to repair a few measures, or sometimes if it is just one note you can change it using a software program, such as Pro Tools.

After recording the basic tracks and doing any fixing that needs to be done, the usual next step will be to overdub vocals, solos, layering parts, or other “sweetening” (strings, keys, percussion, hand-claps, etc.) Attention should be paid to effects and panning, with an ear towards what the final mix might sound like.

It helps if one person is in charge to make the many decisions needed during the production stage; usually, we will call this person the Producer. It could be the artist, a musician, or anyone in the room. (“Producer” is a title that could have many possible meanings, when it comes to recording. For example, it might mean the person who is funding the recording.)

Post-production

While some people consider mixing part of the production phase, it actually represents the first part of post-production. Post-production begins when all (or most) of the tracks have been recorded. There are many decisions to be made during mixing, and each one potentially has a significant impact on the sound of the final recording.

The Mixing Engineer has to decide the volume level, effects, panning, timbre and more, for every note played by each instrument on the recording. Since everyone hears music slightly differently, this is always a great challenge.

The mix has to be pleasing to the greatest number of people, and should not obscure or downplay the most crucial elements of the recording. It should bring out the best of the recorded tracks, putting them together in a cohesive, pleasing whole.

If you have pleased yourself, that should be enough. If you don’t like it, why would anyone else? It is useful to think about your art this way: you make it for you. Chances are if you like it, so will others.

Mastering

After the mix there is mastering. This is a highly specialized function and needs to be done by an Engineer with a specialty in this area of post-production. When a record is mastered, there are even more decisions to be made. How much silence should there be between selections on the record? What should the overall volume and dynamic range be like? Are all songs at the same volume or are some louder than others?

The primary responsibilities of the Mastering Engineer are to make sure the dynamic range is appropriate throughout the recording, that the songs aren’t too loud at their loudest or too soft at their softest, and all the songs fit onto the disc with a small section of silence between them (if making a physical copy of the recording, that is).

All the tracks on the record need to be matched for the overall volume, so some aren’t louder than others. It isn’t as easy as it sounds. While it is fine for the Recording Engineer to mix the work after recording it, it is important the Mastering Engineer be different from the Mix Engineer, as a fresh set of ears is essential for mastering.

Other Post-production Considerations

Besides mixing and mastering, the post-production stage includes duplication (if there is to be a physical CD), completion of artwork and jacket design, photographs, and also promotional plans surrounding the release of the recordings, whether for a label or for an independent release.

Duplication can be expensive for small numbers, but due to economy of scale, ordering more copies lowers the cost of each one. Artwork has to be proofed, and decisions must be made about format, printing, fonts, colors, etc. Liner notes need to be written, pictures need to be finally selected, and again, it can be quite time-consuming.

Usually, you feel some pressure to get it done quickly, because you have been working on it for so long, and can’t wait to get it out for public consumption, or just get on to whatever is next in your life. This is not the time to rush to decisions, because you will have to live with this product the rest of your life, and you don’t want to have regrets.

Listen And Enjoy

Finally, in the end, you have your recording. The most important goal at this stage is to listen to the recording you made and enjoy it. If you have pleased yourself, that should be enough. If you don’t like it, why would anyone else? It is useful to think about your art this way: you make it for you. Chances are if you like it, so will others.

Take away what you can in the way of learning from the recording process. The next time you make a record you should be able to do even better, because you have learned many things, and can fix little things that might have bothered you in your previous recording results.

The feeling of ownership you have over your recordings is akin to feelings you might have for your children; you are releasing them into the world for everyone to see and hear.

When you do listen to your finished recordings, if you notice some things you aren’t so happy with, ask yourself what you would do differently in the future, and make a note of it if you need to. Chances are you will have more opportunities to work in the studio, and you don’t want to make the same mistakes again.

These are just some of the basics about making recordings. As you gain experience you will find what works best for you, how to engineer the process to your taste and develop your own “best-practices,” leading to enhanced quality of recordings and your enjoyment of them.

Site Search
We use cookies to understand how you use our site and to improve your experience. This includes personalizing content and advertising. By continuing to use our site, you accept our use of cookies, revised Privacy Policy and Terms of Use.