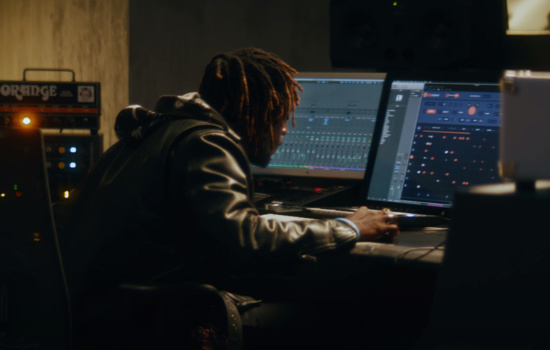
Let’s make a beat with a MIDI sequencer and a virtual drum kit in our DAW.
Find some sounds on your keyboard, know your BPMs for your genre and set up a four-bar loop.
Add a kick drum to the first beat of every bar and a hi-hat on every beat.
Add a snare on an offset beat to the kick.
Use shuffle and swing to add some feel.
Let’s do it all again, but this time with samples.
Introduction
MIDI and Virtual Drums
Preparation
Building your beat
Adding feel
Shuffle & Swing
Building beats with Samples
Dynamics
Timing
Modern Beat Making Trends: Lo-Fi, Trap, Hyperpop, and More
Lo-fi: The Art of Imperfection
Trap, 808s, and the “Type Beat” Economy
Hyperpop, Digicore, and Sound-Design Chaos
Mobile Beat-Making: Your Phone Is a Sketchpad
How to Use Trends Without Sounding Like Everyone Else
Further resources
Learn how to create a vibe with your beats through this introduction to beat making
Pulling together rhythms and grooves is an essential part of building the energy of a track. It can take time to find the right vibe, and getting to know what tools are available to help you find the path is vital in getting your creativity to flow.
In this article I’m going to strip things back to their bare essentials and explain the essence of laying down a solid beat. We’ll look at the instruments that can give you the sounds and how to manipulate the software to introduce variations, transformations and sudden changes in direction. The rest is up to you.
In terms of where you make your beats, you are going to need a DAW. A DAW or digital audio workstation is a piece of music production software that lets you record and edit multiple tracks of both audio and MIDI in order to produce a song.
There are many different flavours in both professional and free versions in which you can build beats.
You may have heard of Ableton Live, FL Studio, Pro Tools, or Studio One; all of these will do the job nicely. Check out our article on the best DAWs on the market and also the best free DAWs if you are only just starting out.
The beat-making methods I’m going to be showing you are completely possible in any DAW you may be using. They all have very similar and common tools and abilities and this tutorial should work in any of them.
You can use MIDI controllers to play beats or program them with hardware drum machines, but in this tutorial, we’re focusing on how to make beats without a MIDI keyboard.
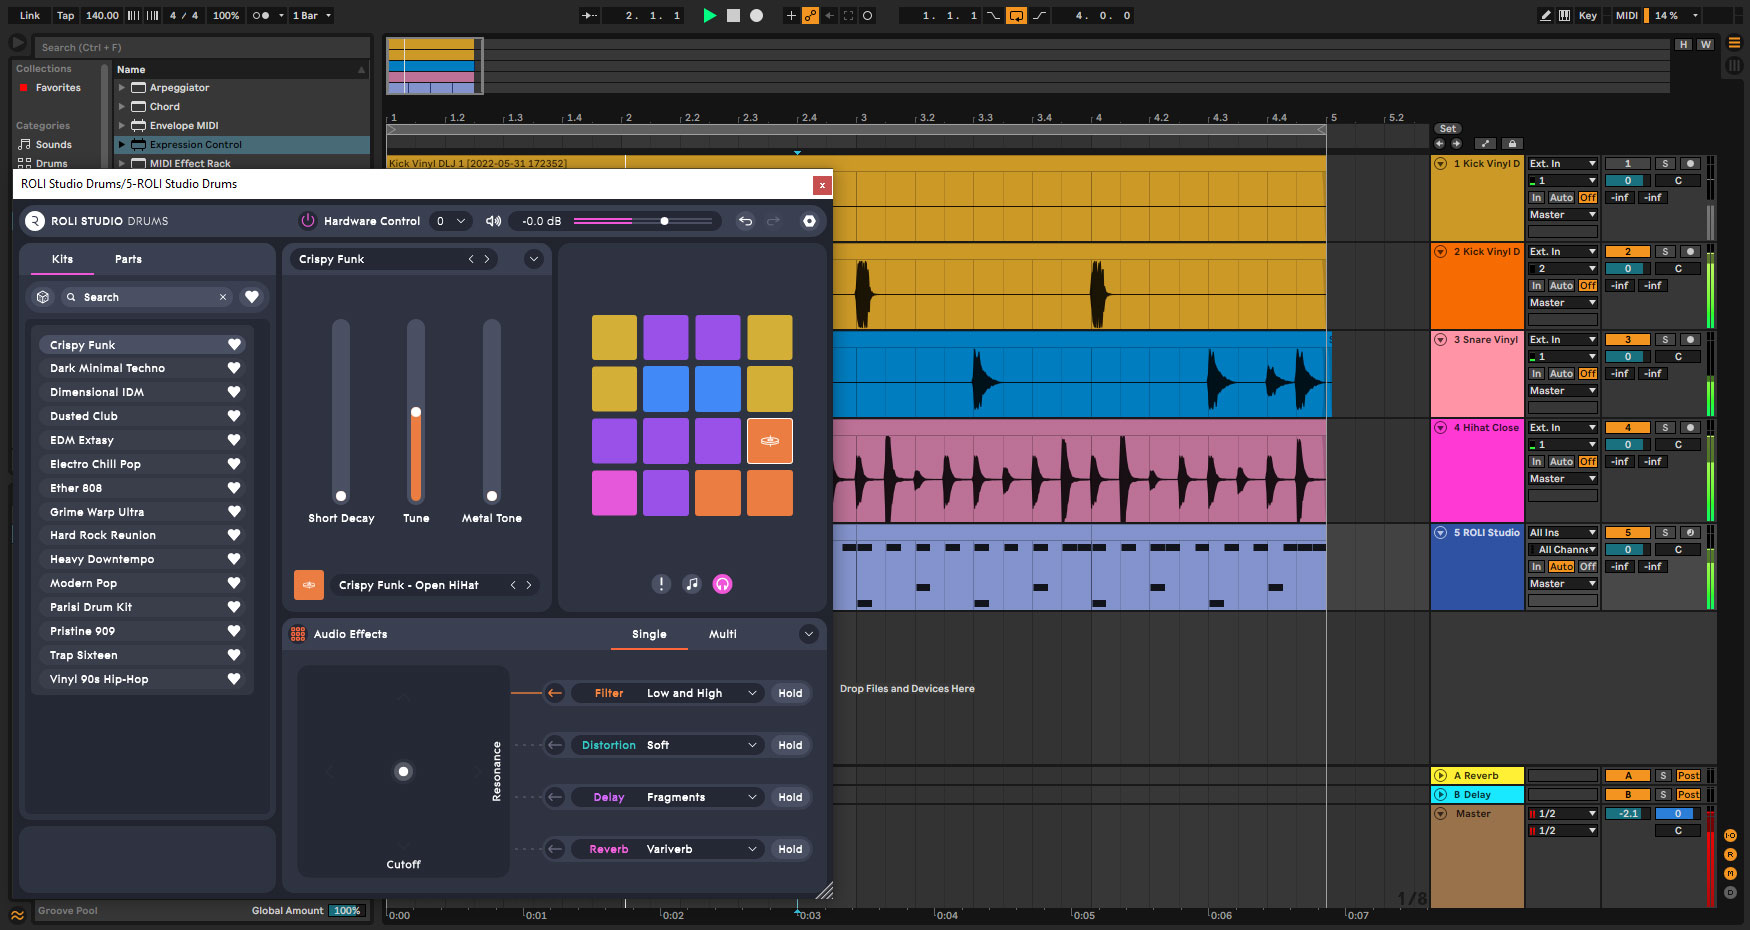
MIDI and Virtual Drums
The first method of beat making we’re going to look at is using MIDI sequencing and virtual instruments.
With MIDI you are playing virtual sounds created by your computer or routing out to hardware drum machines and synthesizers. The idea is that you create patterns of events (or notes) that trigger your chosen drum sounds.
MIDI is extremely versatile because the sounds being used are not permanent, and you can change the sounds while the pattern remains the same.
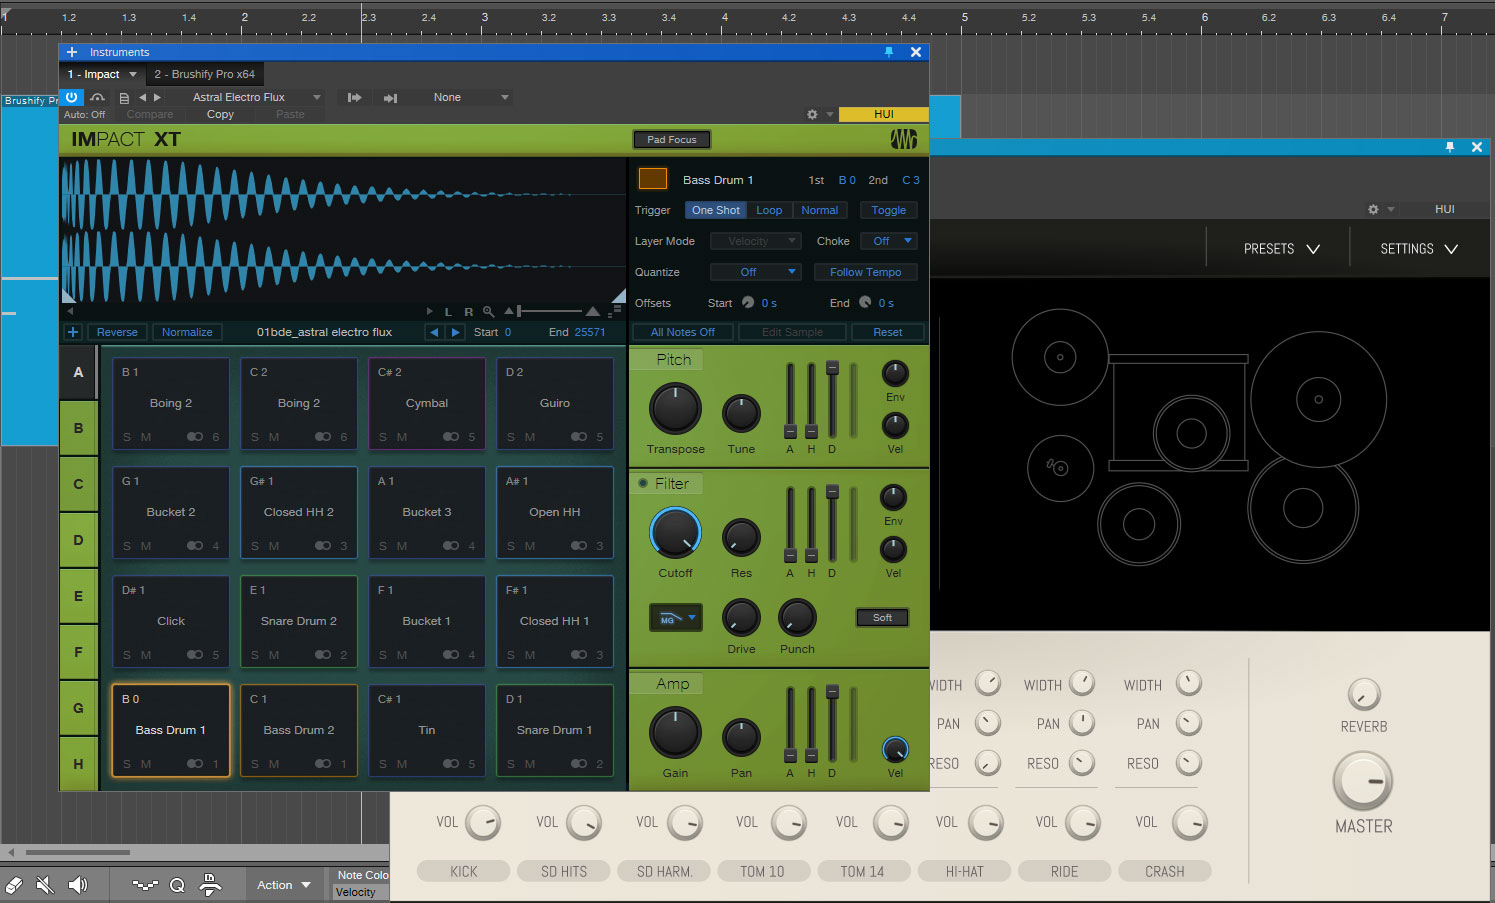
Load up a drum kit. DAWs will come with some sort of virtual drum kit for drum sounds. If not then check out our article on the best free virtual instruments to acquire yourself some.
Your DAW may have a specific drum editor and even drum patterns for beat making, but we’re going to keep things simple and use the Piano Roll editor. It consists of a vertical piano keyboard on the left which denotes pitch and a time-based grid to the right that is usually defined in bars and beats. This is where we will build our beats and don’t worry, this is all about how to make beats for beginners step by step.
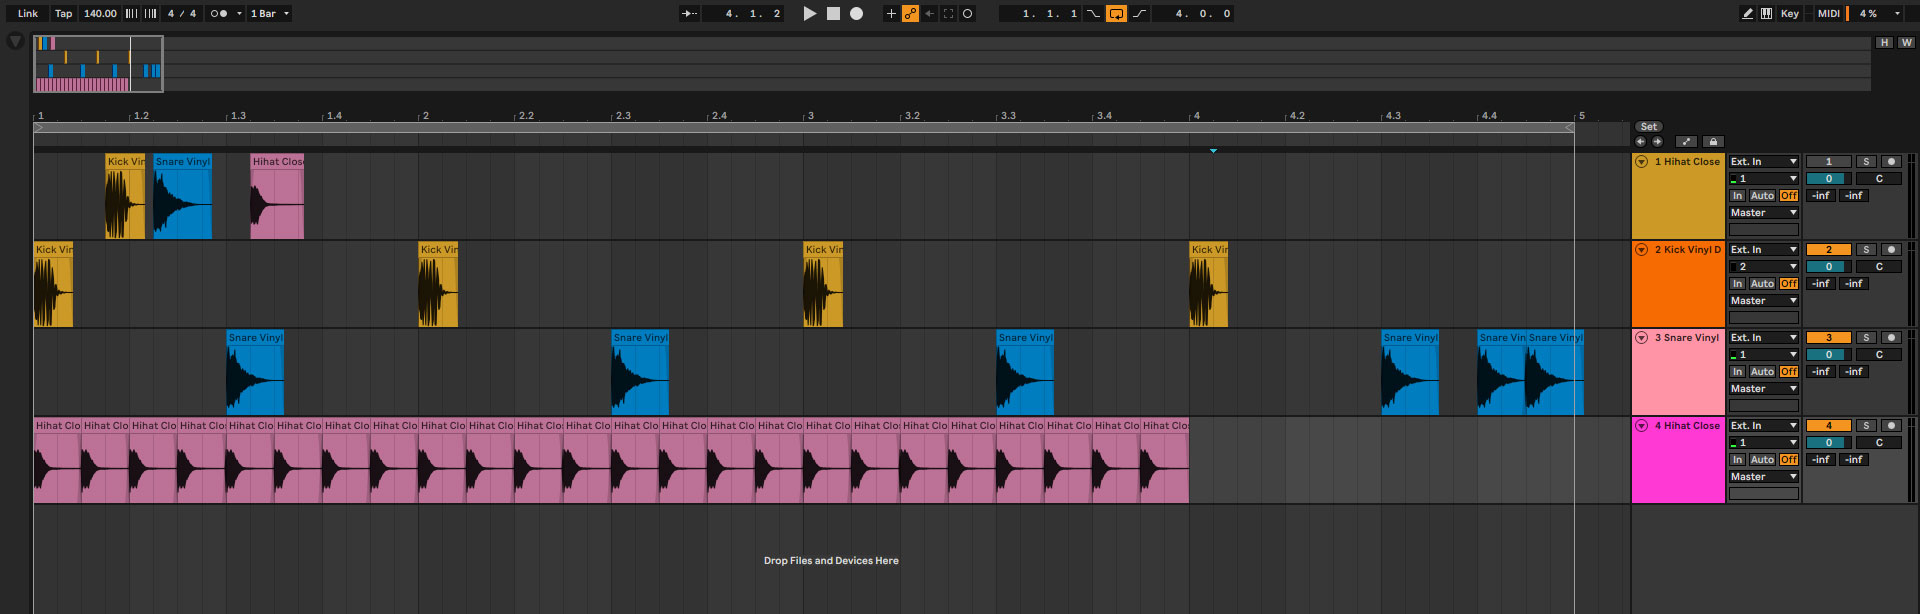
So, let’s look at how to create drum patterns for beats. On your drum kit track create a 4-bar clip, event or space and put markers around it so you can loop it around continuously. Click on the piano keyboard to discover which keys trigger which sounds.
Typically, you’ll find a kick drum on C1, a snare on D1, and a hi-hat on F#1, but that’s not always the case. There are probably loads of other sounds, but we’re going to keep it to these three elements.
We’ll start by setting the tempo in BPM or beats per minute. The speed at which your beat is playing is up to you, but there are some BPMs that are common to certain genres of music. Here’s a rough guide:
Hip hop: 80-100 BPM
Trip Hop: 90-110 BPM
House: 115-130 BPM
Techno: 120 – 150 BPM
Trance: 130 – 145 BPM
Grime: 140 BPM
Dubstep: 70 with a double-time feel of 140 BPM
Drum and Bass: 174 BPM
Rock: 110-140 BPM
Metal: 100 – 160 BPM
Pop: 100 – 130 BPM
R&B: 60-80 BPM
For this tutorial, I’m going to set it somewhere in the middle of around 130 BPM.
Next, check the grid or quantize settings. Quantizing ensures that all the notes or events land directly on the beat represented by the grid. If you set the Quantize to 1/8th, it will give you a grid of 8 beats in a bar, which is perfect for our basic beat.
Hey, what do you think about trying our new Music Career HelperMusic Career Helper really quick? It’s totally free and could help get your career moving fast! Give it a try. It’s totally free and you have nothing to lose.
Building your beat
To kick off our beat we’re going to place a kick drum on the first beat of every bar. If you set your DAW playing in a loop you’ll get a good, solid regular thump. This really is music production for beginners!
Next, add a hi-hat to every beat in the first bar, so that’s 8 in total. Use your mouse to select all 8 notes and copy them. Move the Song Position marker to the next bar and paste the hi-hats in. Do this for all four bars.
Finally, we’ll add the snare to offset the kick. Put a snare on the 5th beat in every bar. And in bar 4 add it to beat 7 and 8 as well just for the simplest fill at the end of our 4-bar loop.
That’s it, that’s your beat built. Ok, so it’s not the most original thing you’ve ever heard, but it’s a solid start from which a million things can happen. Let’s see if we can give it a bit of a vibe.
Adding feel
Solid is good but we want something with a bit of feel to it. You can add a vibe to a MIDI drum track by playing with the velocity. Velocity is a measure of how hard a sound was struck.
At a basic level velocity changes the volume of the sound but, depending on the features of the virtual instrument you’re using, it might change the sort of sound that’s being produced.
When you hit a drum harder it sounds different, right? So, varying the velocity would make it feel less rigid and more human.
This works really well on the hi-hat. A Piano Roll usually has a velocity lane associated with it at the bottom of the grid. The lines or stalks represent the velocity level for each note.
Set a single bar looping and try pulling down the velocity on a couple of hi-hat notes to around 40 or 50%. It gives it an instant groove even though the timing is still exactly the same.
You can also try adding an accent by pushing the velocity up to maximum on a note or two. I find that accents should be used more sparingly than dropping the velocity. It’s better on a single note in a bar or every other bar.
Copy your newly humanised hi-hats to the other four bars, and let’s add an accent to one of those snares at the end. Push the final snare up to maximum velocity and take the one before it down to 50%.
This should give a great contrast between the two and enhance the turnaround of the loop. This is starting to sound move towards how to make beats like professional producers.
Shuffle & Swing
Our beat is still fully committed to being on that grid and for many sorts of music that is exactly what you want. But for more groovy and laid back genres you want to feel the push and pull of being slightly off the beat.
You can manually add this in by turning off the quantise snap-to-grid and moving notes off the lines. Again it’s the hi-hats that work well here. If you move every other hi-hat note a fraction to the right of the line you’ll find the beat takes on a much groovier feel.
It’s very easy to mess this up, and it’s also labour-intensive to do by hand. Most DAWs can add a bit of “Shuffle” or “Swing” to a track by pushing things off the grid automatically to create a very pleasing groove.
In some DAWs it will physically move the grid lines and on others, you can only hear the effect. It has the advantage of still being able to work in a grid while feeling like you’re off it.
Taking this further, it’s also possible in some DAWs to extract a groove from an existing sample or loop and use that as a template for the groove of your own song.
The other common method of making beats is with samples. You can get samples from all sorts of places, you’ll often get loads with your DAW, or you can purchase libraries of samples from many online stores.
These are going to work a little bit differently from the MIDI sequencing method but many of the concepts are the same.
So, find three samples: the kick, snare and hi-hat, and drop them onto an audio track in your DAW. We’re not going to be using a piano roll as this is not about notes triggering sounds; this is about arranging sounds in tracks so they play when you want them to.
You can arrange samples on a single track, but if you want to learn how to mix beats it’s much easier to have separate tracks for your kick, snare and hi-hat. This also gives you the versatility of adding different plugins to each sample and adjusting levels independently.
The build of our beat is going to follow the same idea as the piano roll. You should be able to set up a grid to snap to in the Track or Arrange view of your DAW. Set up a 4-bar loop like before and copy/paste your kick drum onto the first beat of each bar.
On the snare track place snare samples on the offset to the kick plus those couple of extras at the end. Add in the hi-hats to every 8th note in a bar and you’ve rebuilt your beat out of samples.
As you play it back and marvel at your awesomely simple beat don’t forget to mute the audio track that has your three samples on it.
Dynamics
Adding feel back into a sample-based track is a little bit different as we’re not dealing with MIDI and velocity.
This time around we have to set the gain or level for each sample. Usually, within a DAW there are handles within a sample clip that let you adjust the fade-in, fade-out and overall level for that sample. But not always.
In my example with Ableton Live, the level of a clip is dealt with in the Clip Display beneath. I can use the Gain control to adjust the level.
The idea, as before, is to vary the level of some of the hi-hats to give a more realistic feel. Give yourself a 1-bar loop and try it out.
You can also add an accent to one or two of the hits by boosting the gain a little bit. Once you’re happy with that loop, you can copy/paste it into the other bars. Maybe vary it a little bit, maybe accent one of the snares. Once you can feel what it’s doing, you’ll find it useful in all sorts of places.
Another good tip is to use the length of the sample to vary the sound. Shortening the occasional hi-hat will make it feel different and so introduce more variation. Use the fade handles to smoothly close the sound down so it’s not too noticeable.
Timing
Adding a bit of shuffle or humanisation can be more difficult when playing with individual sample hits.
It seems that MIDI notes can be easily adjusted whereas the start time of sample clips appears much more independent. Some DAWs will let you add a groove or shuffle to the main grid, which could also affect the samples, but many do not.
This leaves us with a couple of options. We can shift samples ourselves by turning the grid off to try to find the rhythm we’re after or turn our multitrack drum loop into a single loop.
DAWs tend to like drum loops and can often give you tools to process and adjust the timing within a loop. For instance, in Ableton Live, I can use the “Consolidate” command to combine the individual samples into a single loop. I can then use the Groove option in the clip display to add different feels to the loop from a library of options.
It’s interesting how both the MIDI and sample-based options have their pros and cons.
Modern Beat Making Trends: Lo-Fi, Trap, Hyperpop, and More
Once you can build a basic drum loop, the next question is usually: how do I make my beats sound like they belong in 2025? The fastest answer is to study what online scenes are doing right now, then steal the ideas you actually like. Lo-fi hip hop is still huge, trap keeps evolving, hyperpop is basically “no rules,” and mobile beat-making is making studios optional. This section is a tour of the trends beginners talk about the most, and how to try them without losing your own sound.
Lo-fi: The Art of Imperfection
Lo-fi is the genre where “perfect” is kind of the enemy. The drums often sit a little behind the beat, the chords feel dusty and warm, and a tiny bit of noise is part of the vibe. If your beat feels sterile, lo-fi tricks can fix it fast: swing the hats a touch, soften the transients, and let textures live in the background instead of fighting the lead.
You do not need fancy plugins to get there. Start by low-pass filtering a sample or a Rhodes-style patch, add gentle saturation, and layer in a quiet room tone, vinyl crackle, or field recording. Then resample your loop and nudge a few hits off the grid so it breathes. The goal is “human,” not “messy.”
Trap, 808s, and the “Type Beat” Economy
Trap is still the default language of modern beat-making, and the details matter. 808 tuning, short slides, and clean low end will make or break the bounce. Pair that with crisp hats (including rolls and little stutters), and you’re most of the way there. The rest is taste: choosing sounds that feel current and leaving space for the artist.
“Type beats” are a big reason trap producers get discovered. You post beats labeled in the style of an artist, and people who search that sound can find you. Treat type beats like practice and marketing at the same time: copy the feel of a reference track, then change one core thing so it becomes yours. If you want a deeper tool overview, our guide to beat-making software can help you choose a setup that fits your workflow.
“I do not go for doing the same thing over again. I get bored very quickly.” – BNYX
Hyperpop, Digicore, and Sound-Design Chaos
Hyperpop (and cousins like digicore and glitchcore) is where you stop asking permission. Distortion is normal, pitch-shifted leads are normal, and hard clipping might be the point. Try extreme compression, bitcrush, and formant shifting on a synth or vocal chop, then build drums that hit like pop and rap at the same time.
Even if you never make a full hyperpop track, the mindset is useful. Borrow one technique, like a ridiculously bright lead layered with a gritty, blown-out bass, and drop it into a trap or lo-fi beat. That one “wrong” sound can become your signature.
“You can’t stay in one thing or you’ll get left behind.” – BNYX
Mobile Beat-Making: Your Phone Is a Sketchpad
Mobile beat-making is not a gimmick anymore. Apps like GarageBand, BandLab, and FL Studio Mobile let you sketch melodies, chop samples, and build drum patterns anywhere. Use your phone like a notebook: capture ideas fast, then export stems when you’re ready to finish the track in your main DAW. If you’re new to the bigger picture, our music production guide will help you connect beat-making to arranging and finishing songs.
“Grab whatever you have and just make it. If it’s good, people will notice.” – Steve Lacy
How to Use Trends Without Sounding Like Everyone Else
Trends are fun, but the best producers use them like ingredients, not instructions. You want the energy of what’s current, plus a few choices that sound like you. Here’s a simple way to experiment without getting lost.
Pick a reference track, then steal one thing. Maybe it’s the drum pocket, maybe it’s the sound of the snare, maybe it’s the way the bass drops out for a bar. One focused takeaway beats copying everything.
Limit your palette for one beat. Use one drum kit, one main melodic sound, and one bass. Restrictions force decisions, and decisions are what make a beat feel finished.
Turn your loop into a quick arrangement early. Copy it across two minutes, label sections, then mute and swap parts to create contrast. This prevents the classic “8-bar loop forever” problem.
Do a “weird pass” on purpose. Add one unexpected texture, reverse a hit, pitch a vocal chop, or leave a bar of silence. The goal is a moment people remember.
Get feedback where producers hang out. Reddit and Discord can be brutally honest, which is good if you ask specific questions like “Is the kick too loud?” or “Does the chorus hit?”
Save your best sounds. When you nail an 808 chain or a lo-fi texture, save it as a preset and build your own kit over time. Your personal library becomes your unfair advantage.
Further resources
Here are a bunch of videos that you may find helpful in your pursuit of the beat.
Don’t forget to check out our list of the best beat making software that may open up a new world for you!
All street prices listed at the time of writing.
We only recommend products or services we use and love.
We are not affiliated with any product or service and make no commission from any affiliate links or sales.